
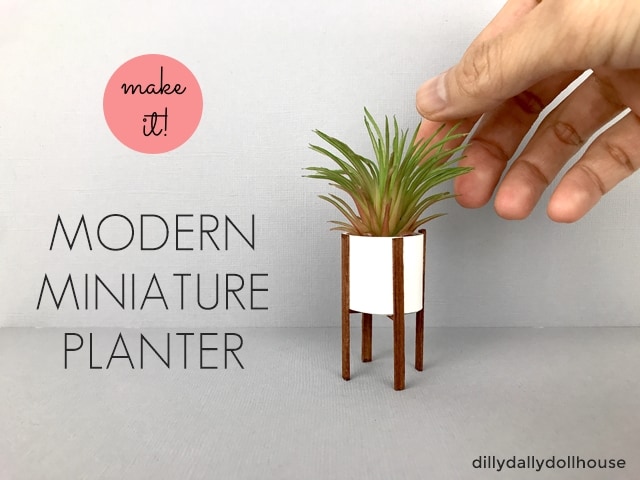
When you search for “modern planter” images, you’ll most likely see these mid-century simple cylinder white pot with wooden legs popping up in the results. It’s actually very easy to make one of these modern miniature planters. You only need common craft tools and materials; nothing fancy! I’ll also show you a trick to make it look “seamless”.
Materials for Modern Miniature Planter
There are five (5) main parts of the planter: bottom, side, bottom supports, legs, and the plants.
Part #1: the bottom
The bottom of the planter is a circle of any size between 0.75″ to 1″. I made several circles in both sizes. You can use any paper-based materials to make the circles, such as:
- 4-ply matboard (I cut a whole lot of 0.75″ and 1″ circles using my beloved Cricut Maker)
- Cardstock, cut into circles with diameter of your choice. You will want to make multiple circles that will be stacked together for thickness.
- 1″ wood disks (or check your local craft shops)
Part #2: the side/body
White cardstock works best for the body because it has a little bit of stiffness but still easy to bend. In a pinch, you can use regular printer or copy paper as well, though it won’t be as stiff as cardstock.
For the best proportion, the height of the body should be roughly the same as the diameter of the bottom, or decrease by 0.25″ for a squatter planter. So for a 1″ bottom, go with 0.75″ to 1″ side height. For 0.75″ bottom, go with 0.5″ to 0.75″.
Cut a strip of the cardstock at the height measurement of your choice, along the shorter end (the 8.5″ side) of the cardstock .
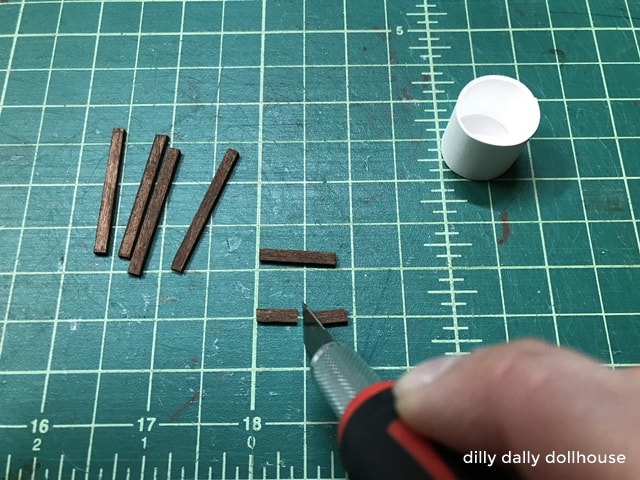
Part #3: the bottom supports
This part is more for looks than function, as the planter itself is practically weightless. But it looks weird without the supports, so we should still include them.
You can use 1/16″ basswood or coffee stirrers. The width should be 1/8″ or slightly smaller. I cut my basswood at 1/8″ wide. You can also slice the coffee stirrers at half the width to get a narrower width (I think the planters look more elegant with narrower widths).
Cut two (2) pieces at the same width/diameter of the planter’s circle bottom, which would be 0.75″ or 1″.
Part #4: the legs
Use the same material as the bottom supports (part #3), and at the same width. You can start with double (2x) the height of the planter side, or 1.5x to 1.75x for a squatter look. So for a 1″ tall planter, the legs should be anywhere from 1.5″ to 2″. For a 0.75″ tall planter, the legs could be 1″ to 1.5″. A 0.5″ tall planter can have legs from 0.75″ to 1″.
Cut four (4) pieces for the legs.
Part #5: the plants
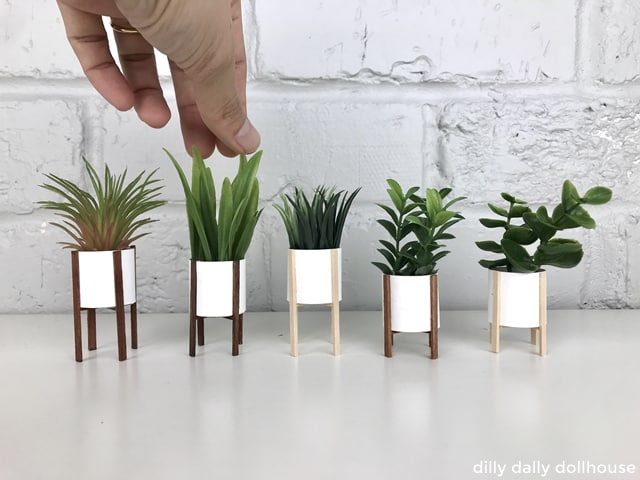
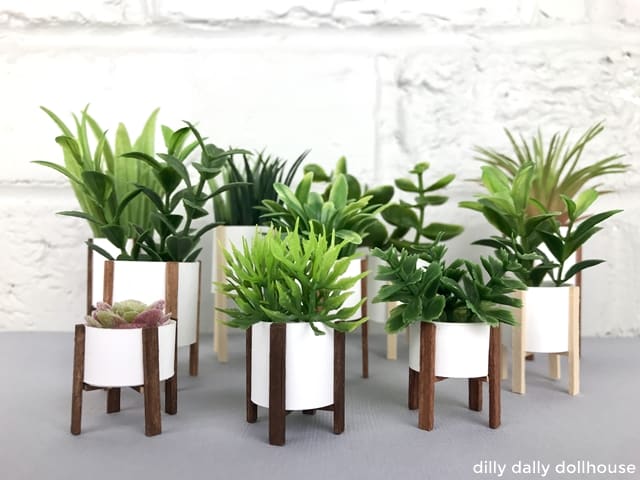
I recommend you visit your local craft shops that carry fake plants, and look at the selections in person. Any kind of greens with small leaves will work here. Grass mats work as an alternative to Sansevieria (the spiky snake plant) that is commonly used with this type of modern planter. Mini rosette succulents are also adorable peeking out from the top of the planter. Faux Tillandsia (air plant) is great for an edgy look.
You may need some floral foam or styrofoam (or similar product) for inserting your plants.
Assembly of Modern Miniature Planter
Step 0: Stain or paint first!
If you want to stain or paint the legs and supports, it’s best to do it now. Once assembled, it will be practically impossible to stain or paint the wood without accidentally getting it on the cardboard.
Step 1: Make the planter bowl
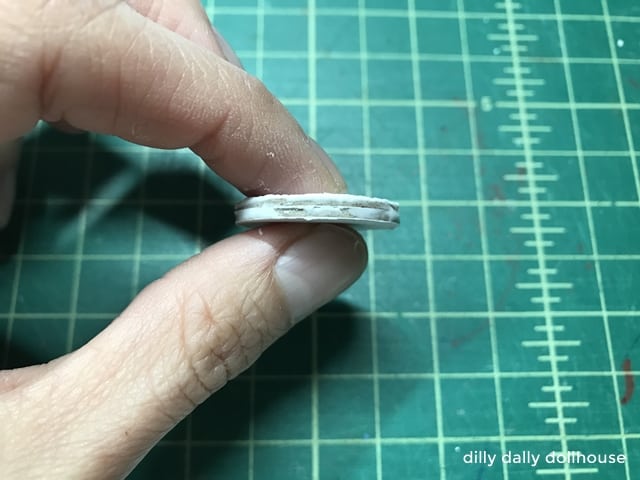
Stack and glue a few circles until it’s about 1/8″ thick (or more). My matboard is 1/16″ thick, so I stacked two of them. You can always add more circles later, if you use squat plants like mini rosette succulents. But for now, 1/8″ is enough to get started.
Apply a bit of glue on the edge of circle.
Take your strip of cardstock and wrap the long edge around the circle.
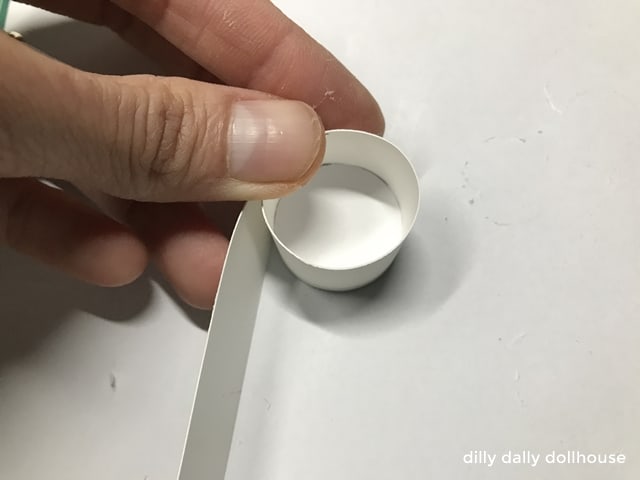
Glue the end of the strip. If the inside seam is gaping, glue it close so it looks neater.
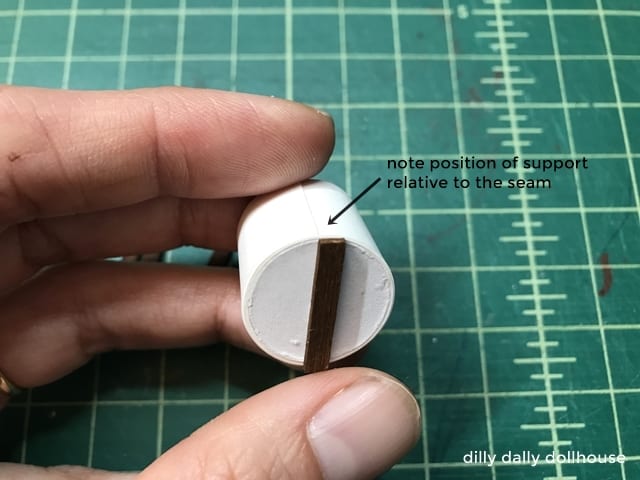
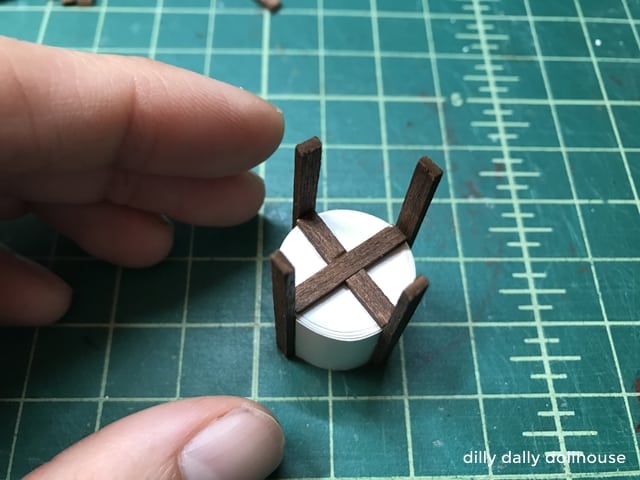
Step 2: Attach the bottom supports
Cut one of the bottom supports in half in the middle and set aside.
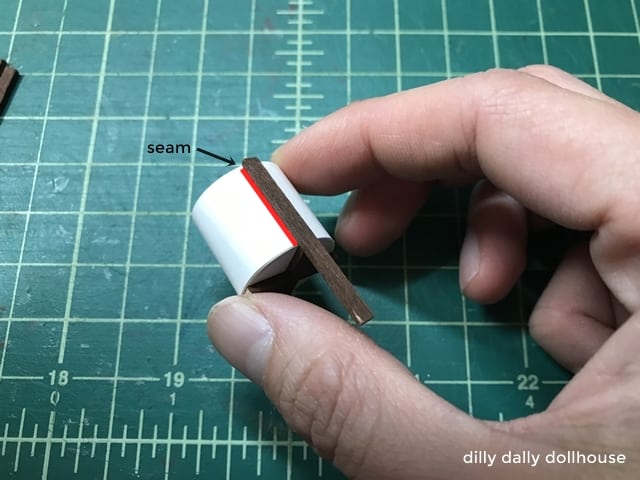
Take the longer, uncut support and glue it to the bottom of the planter. You want this support to be right where the outer seam ends on the body.
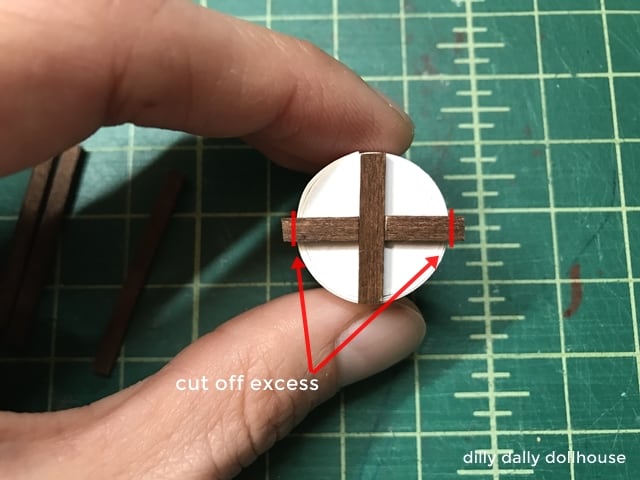
Attach the two shorter supports and glue them perpendicular to the longer support. Cut off excess support that juts out of the planter body.
Step 3: Attach the Legs
Apply glue on the top half of the legs. Attach the first one right by the end of the cardboard seam. This will hide the seam.
Attach the rest of the legs, lining them up with the bottom supports. Make sure they’re all straight. Let the glue dries before inserting the plants.
Step 4: Add your plants
Dry-fit your plants inside the planter before gluing. If the plants require a shallower planter, simply glue on more circles as needed. Insert floral foam as needed, then your plants.
Step 5: (Optional) Seal with Mod Podge
You can add a bit of sheen by brushing the whole planter with Mod Podge (satin or gloss finish).
Complete!
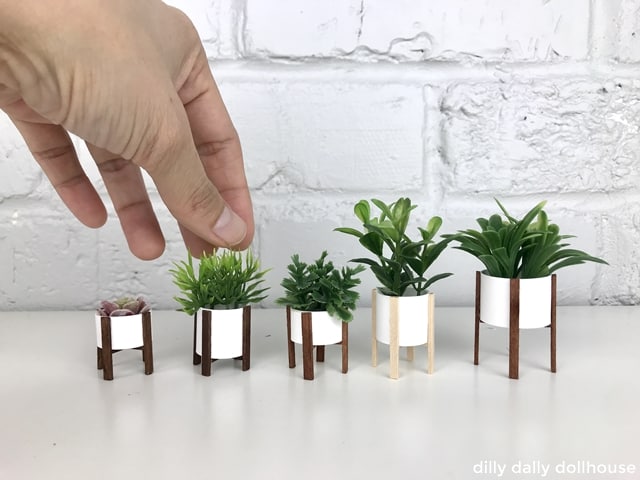
And now you have your own modern miniature planter! I made several in various sizes and plugged in different greens from my stash.
You can omit the legs too, to make a simple white planter. The seam will be visible, but you can just position it away from the front.

These planters fit well with my other mid-century inspired minis, such as this wood case sofa, this rocking chair, or this slat coffee table.
Made your own? I’d love to know!
What motivates me the most is seeing you use my tutorials to make your own minis! There are many ways you can share your projects:
- comment below to let me know (or if you have any questions about it–for the benefit of others also!)
- link back to my site or this tutorial,
- tag me on Facebook or Instagram,
- share your version on my Facebook group!
For plants I used old fake fish tank plants I kept long after the tank went. They do the job perfectly. Thanks for the planter tutorial to go with them.
These are adorable and you make it look so easy. Thanks for doing the math to take the guesswork out of getting the proportions right. I had done a variation on this planter using a slice of pvc pipe and adding a slightly smaller disc to the bottom. You can see it a few posts back on my Instagram.
Thanks Sherrill! 💕 I see your planter! The PVC pipe will make a much sturdier planter – great idea! ☺