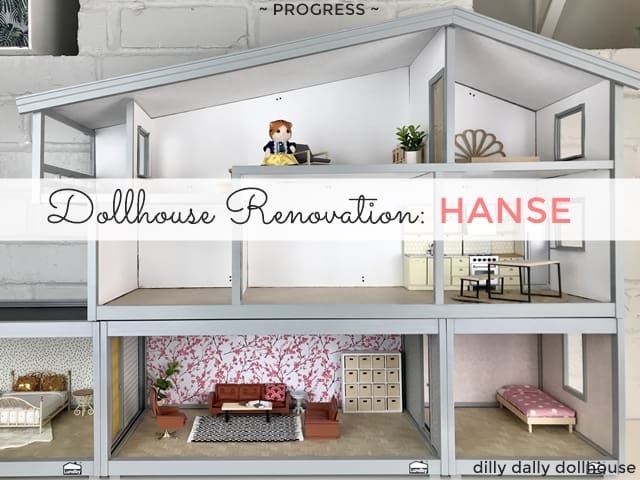
I finally got started my Hanse dollhouse renovation!
You may already know I’m a big fan of Lundby and 1:16 scale. From the Lundby Lovers group, I learned about the existence of “opposite Lundby”, which is what I call a Lisa or a Hanse dollhouse (because of the reversed floor plan). These houses are hard to come by in the US, so I looked abroad to get a fixer-upper. Eighteen months after I received it, I was finally ready to work on renovating it!
You’ll see the progress of putting together the main structure until it’s practically ready to be decorated.
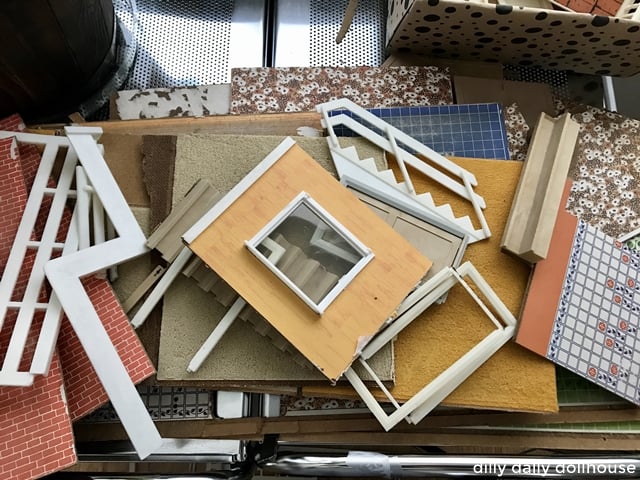
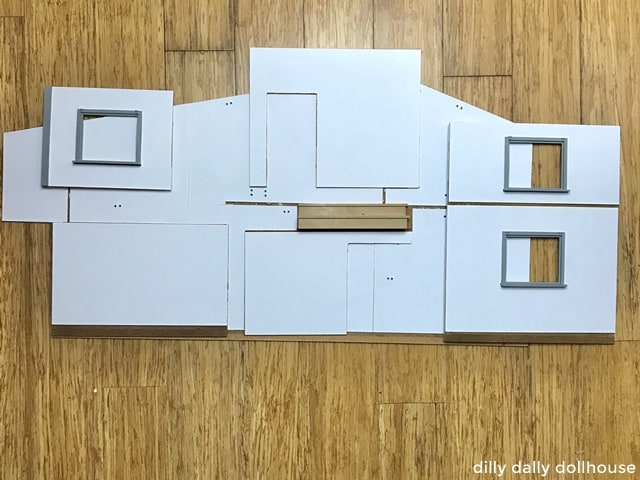
But first, here’s what we start with… disassembled parts to be put together.
LUNDBY ROOM BOXES AS PART OF THE PLAN
If you’re wondering, I got my Hanse parts from Lundby Corner (on Etsy and Facebook). I love ML, she’s a fantastic seller and her prices are reasonable!
In the ideal world, I would also have a Lisa extension floor. But finding one like finding a unicorn, so plan B is using Lundby Room boxes as the extension.

What a great plan, I said as I patted myself on the back. My trim color is already decided. Gray on everything!
Many people don’t like the gray trims of the latest Lundby Life series, but I think it looks quite modern and sophisticated. The muted colors reduce visual noise and it’s easy enough to add accent colors from the miniature pieces.
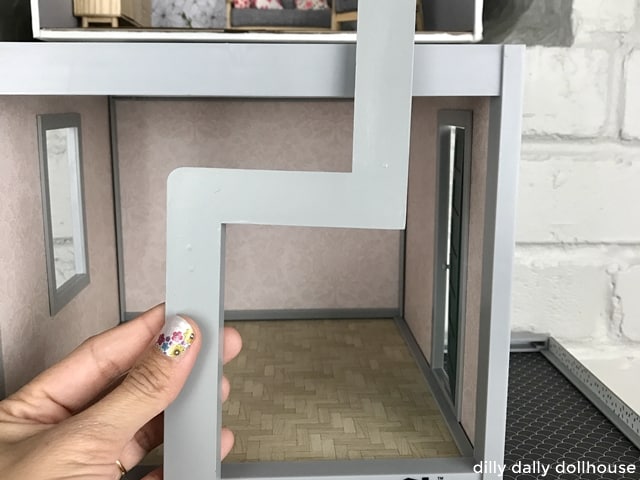
PAINTING THE TRIMS GRAY
The paint I used to paint the trims is CraftSmart silver gray acrylic and it was an almost exact match to the Lundby Rooms.
COVERING THE ROOFS
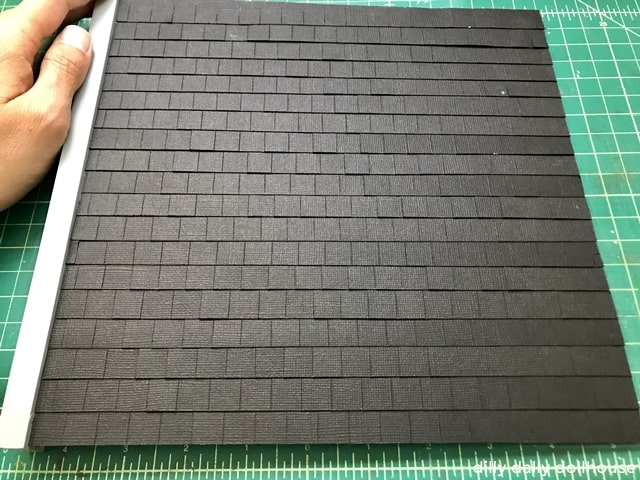
I cut black textured cardstock into 1″ strips at the width of the roof (9.75″), then cut the strips more than halfway in at 0.5″ apart. I used two staggered patterns like so:
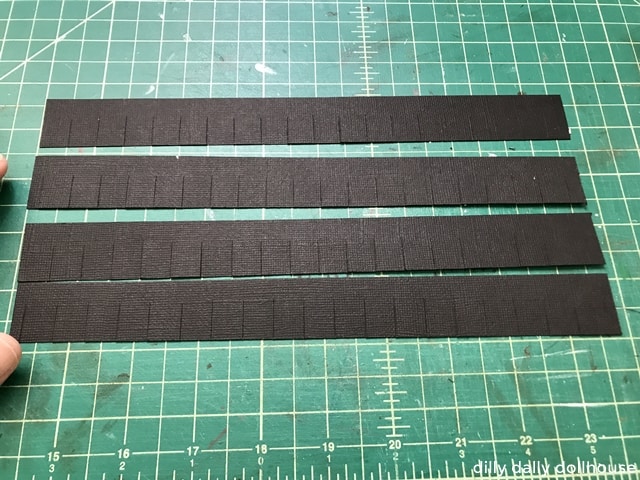
Then I simply glued the strips on the roof from the bottom, one at a time. The result is pretty darned good, if I do say so myself.
EXTERIOR WALLPAPERS
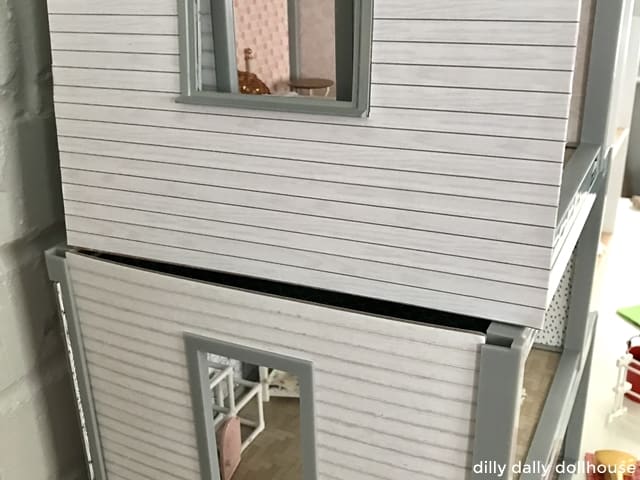
I found some seamless wood siding textures from SketchupTextureClub (a great website to get free digital textures and backgrounds!) and picked the closest color and pattern to that of the Rooms. Then I resized them to the correct scale in Inkscape, tiled them up, and print. Cut out around the windows, and attached using Grandma Stover’s glue.
FLOORS
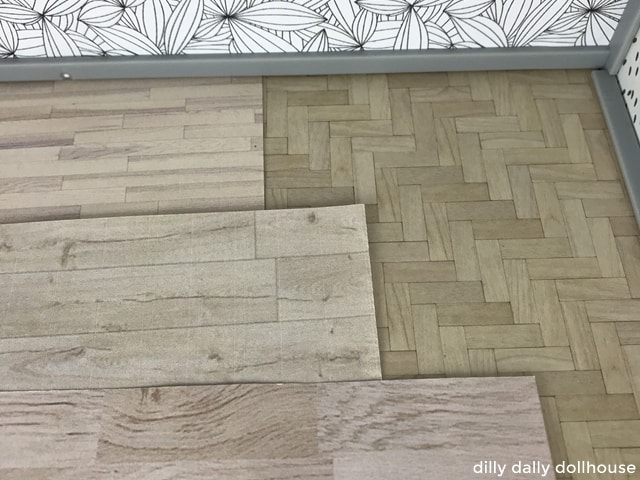
Finding a close match for the floor is more difficult, so I prioritized matching the color instead of the parquet pattern. I settled with the one shown in the middle. Then I rescaled and tiled in Inkscape, print, then glue it on throughout the house.
INTERIOR WALLPAPERS (progress)
I’d love to be able to change up the interior wallpapers, so instead of applying fancy ones directly, I covered the walls with white textured cardstock. The white base acts like a primer, hiding the bold original wall colors. If my fancy wallpapers have a white background, the previous colors won’t show through.
ASSEMBLY
This is where I struggled the most. First I tried assembling back-to-front, but it was practically impossible to keep the floor panels up. So I flipped it the other way: front-to-back, and it was easier.
I put the front frame face down on the floor, added some glue into the crevices, and inserted the side walls and floors in the appropriate places.
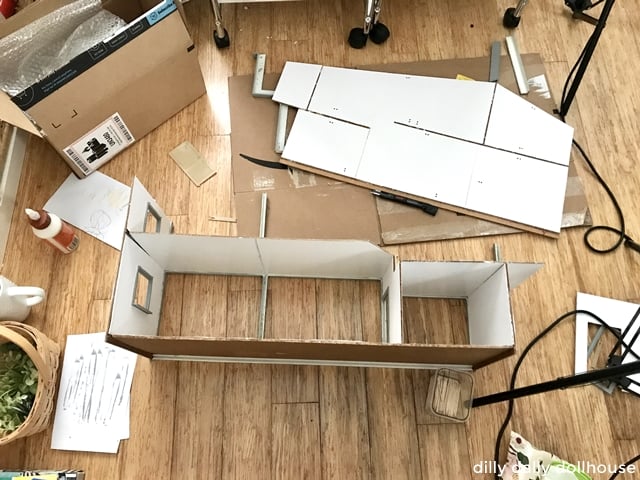
Assembling the back wall, roof, and back trims was quite frustrating! Things didn’t line up correctly… when I fixed one, another part got dislodged. Fix that one, a different part fell off. What eventually worked for me was putting together the back wall and roof at the same time, with the help of the bungee cords.
The bungee cords helped to keep the panels in place, while I positioned them and added glue to the crevices. I didn’t overtighten the cords, just enough pressure to keep things together.
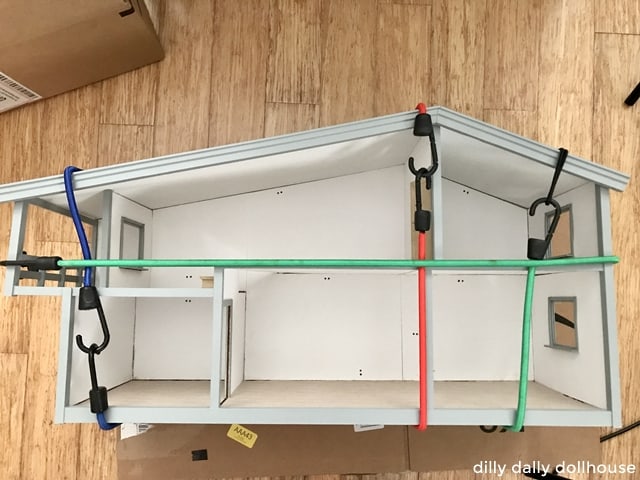
The panels still didn’t line up perfectly, but with the motto of “progress, not perfection”, I did the best I could. I left it to dry overnight and hoped the house could stand up the next day.
IT STANDS UP!
And stays up! Look how proud it is, standing on top of the Rooms.

There are still some patching jobs to do, which I may go in more details in another post. I feel so accomplished to finally get it set up, and my floor is no longer covered by the dollhouse panel pieces!
If you’d like to check out other renovations, I’ve done a Brio, which you can browse her: part 1, part 2, part 3.
Made your own? I’d love to know!
What motivates me the most is seeing you use my tutorials to make your own minis! There are many ways you can share your projects:
- comment below to let me know (or if you have any questions about it–for the benefit of others also!)
- link back to my site or this tutorial,
- tag me on Facebook or Instagram,
- share your version on my Facebook group!

