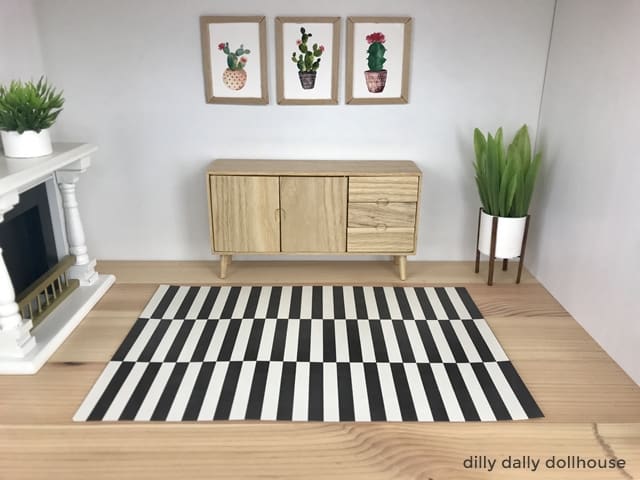
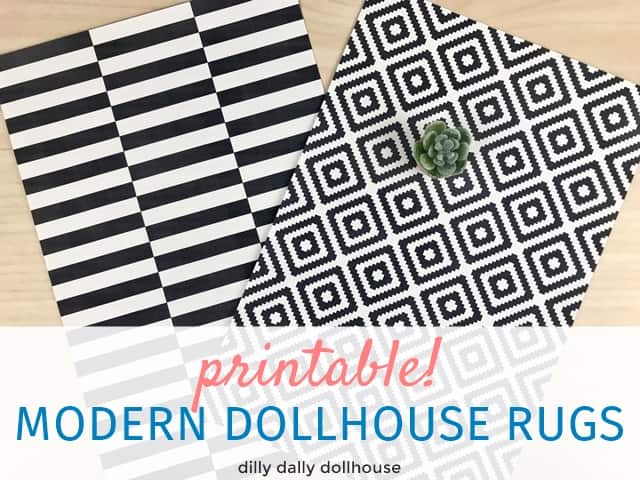
So this isn’t a tutorial post, though I did make these black-and-white modern dollhouse rugs myself, using Inkscape (a free design software). Inkscape has opened up the world of miniature designs to me, but that’s a post for another day.
The stripey rug was inspired by IKEA Stockholm 2017 rug that is still for sale today. I based the other geometric one on some images online, but after further research, I found out IKEA did make this design (the rug is called Lappljung Ruta) around 2014. Now you know that when I say I’m inspired by IKEA, I’m not kidding.
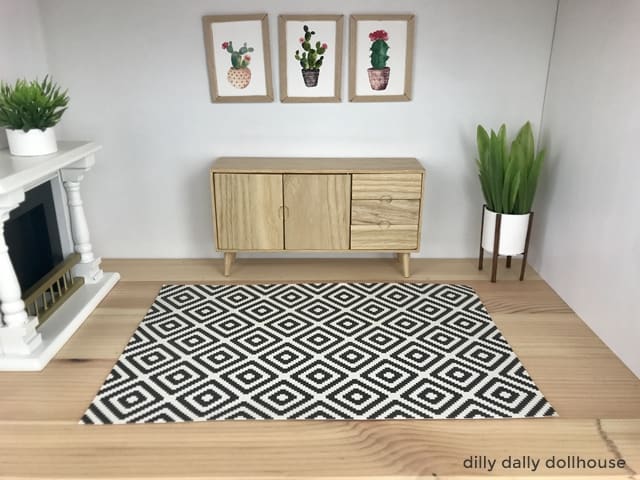
Download the Modern Dollhouse Rugs!
When you’re ready, head on to the resource library to download and print the rugs (under the PRINTABLE ACCESSORIES section). If you’re a subscriber, refer to my latest email to get the password. Not a subscriber yet? Sign up here and the library password will be emailed to you!
Features of These Printable Dollhouse Rugs
The black-and-white is actually black-and-beige. On the screen they look a bit dingy, but when printed out, the beige will look better, softer than stark-white.
Each rug measures 5×7.5 inches. You can print them as 4×6-inch rug by printing at 80% scale. I like rugs of these sizes, as they work with both 1:12 and 1:16 scales, and two can fit on regular Letter or A4 sized paper.
The rug image is oriented at the top half of the page, so you can reinsert the paper and print the second rug on the same paper. Be sure to check your printer setting on how to reinsert the paper, so that it prints on the other end of the paper, either same page or on the back. Or, you can print on the same end, but on opposite face for a reversible rug (this will not work on one-sided paper like velvet paper or cotton paper). You don’t want the second rug to print on top of first rug.
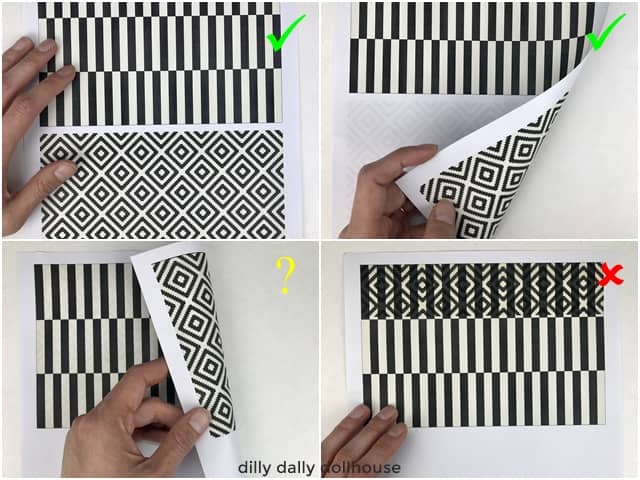
Paper Options to Print the Dollhouse Rugs
I tested the rugs on different types of paper using standard quality. My printer is an Epson EcoTank ET-4760, which is a color-printer but not a photo-printer. Your results may vary based on your own printer.
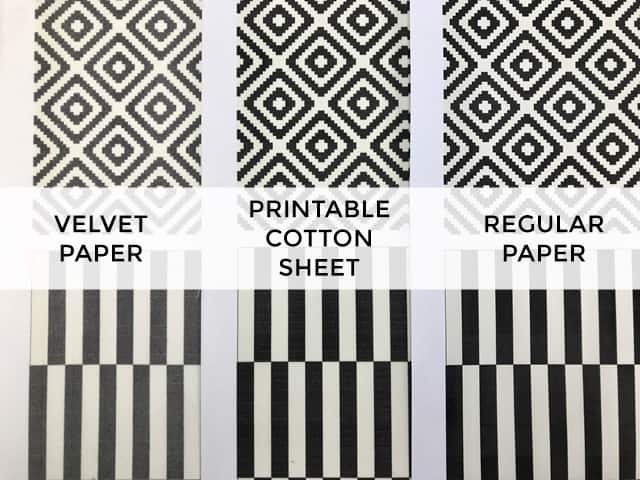
Option 1: Velvet (or Velour) Paper
The front of the paper has a fuzz feel like very short-pile velvet. Texture-wise, it’s the closest to what a miniature rug should feel like. You can print only on one side of the velvet paper.
I had high hopes for velvet paper, but for some reason the colors turned out faded. The black came out gray, though the beige is pretty true. I will have to test again with rugs of different colors, to see if the problem is with my printer or with the paper.
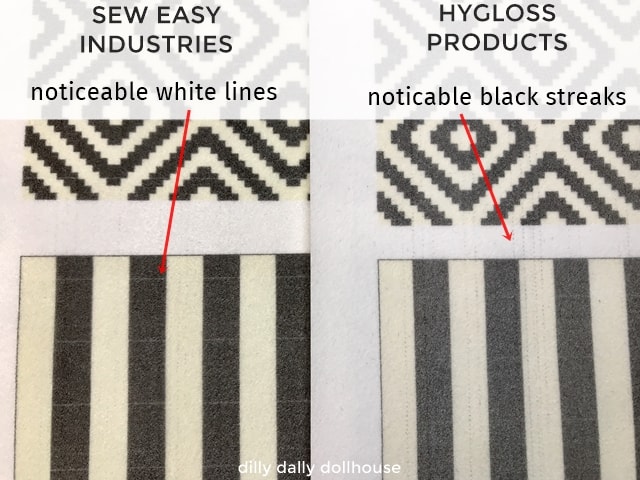
I tested two velvet papers: the Sew Easy Industries (SEI) brand and the Hygloss Products brand (because I happen to have both). SEI is of better quality and softer to the touch. The colors turned out more saturated than on Hygloss. Faint black streaks appear on the papers, but they are less visible on the SEI paper. Although the color distribution (on standard quality) is more even on the Hygloss paper; the telltale white lines are more apparent on the SEI paper, though printing on high quality may eliminate this issue.
Based on the test results, I would recommend the SEI brand over Hygloss.
Option 2: Printable Cotton Sheet
This is an actual sheet of cotton that is backed by paper and can be printed (only on the cotton side). You peel the paper backing after printing, and then you have this cotton sheet of fabric that can be sewn. I use the Jacquard brand for which is designed for inkjet printers.
The colors turn out great on the printable cotton, saturated enough and pretty close to regular paper. Once the paper backing is peeled, the fabric itself is rather thin, so I recommend reinforcing the back with single-sided fusible interfacing or sticky-back felt sheets to add more “body” to the rug. Reinforcing will also minimize fraying.
Option 3: Cardstock or Regular Paper
If you don’t particularly care about the texture of the rug, cardstock or even regular printer paper is always a great, economical option. You can print on both sides of the sheet, to make a reversible rug. Most of the time, nobody would know that the rug is paper, unless you tell them.
Made your own? I’d love to know!
What motivates me the most is seeing you use my tutorials to make your own minis! There are many ways you can share your projects:
- comment below to let me know (or if you have any questions about it–for the benefit of others also!)
- link back to my site or this tutorial,
- tag me on Facebook or Instagram,
- share your version on my Facebook group!

Thought I have not signed up for anything yet, I am finding that most of my searches have led me to your site.
I’m building my first dollhouse, starting in the new year, and am just researching options and possibilities.
I have to tell you, I love all your blogs! You make it simple to understand and the links to items help tremendously.
Thank you!