One of the most frequently asked questions by someone who is starting their mini-making adventure is “what tools or materials do I need to start making miniatures?”. If you ask me, there are certainly some basic tools that most of us will need, such as a craft knife and glue. As we go further along, we may find that we need additional tools will help us enhance our crafts and make our processes easier and faster.
I call this list “a guide” to tools and materials for making dollhouse miniatures, not “THE guide”, because we may have preferences in what tools and materials we work with, and even what kind of miniature pieces we like to make. For example, I don’t make miniature foods, so you would not find polymer clay here.
I’ll explain why I use these tools, so hopefully you can decide if you need it or if you can use a different/similar item. If you have a better alternative or any additions to my suggestions below, please let me know and I’ll give it a try!
Here is a little table of content of what I’ll be covering:
CUTTING TOOLS
Craft Knife(s)
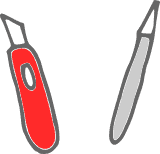
A good, sharp craft knife is argueably THE basic craft tools that everyone should have. I have a few that I use:
- This X-acto light-duty box cutter is my go-to knife. I borrowed it from my husband’s toolbox and never put it back. I like that it’s very easy to get a new blade… just snap off a section and voila, a sharp blade!
- I also use this off-brand Fancii craft knife set as backup, when my box cutter is away from my desk (usually my husband borrowing it back). The blade that is attached to the red-handle is great for “chopping” wood sticks with a downward pressure.
- Both miter saw and miter shears are great for cutting at angles. Miter saw gets cleaner cut ends, while miter shears are faster but the cut edges are not as neat. I have both and use them alternatively depending on what I need to achieve.
- A rotary cutter makes it easy to cut fabrics, when we have an upholstery project to do. I use my Olfa rotary cutter (from my sewing days) to cut the rugs that I used to sell on my Etsy shop. A pair of small fabric scissors are a good alternative, and they’re also handy for cutting off excess fabrics.
- A self-healing cutting mat is another must-have basic that I think all makers should have. I put it under Cutting Tools because its main purpose is as a cutting surface, protecting your table from cuts and stains. The grids are also great for quickly measuring things. Mine is an Alvin 24×36 that covers most of my desk.
Cricut Maker
Okay, let’s get straight to the point. Cricut Maker is my most favorite mini-making tool. Without it, I couldn’t have gone this far with making my dollhouse furniture. Heck, I probably wouldn’t even have started! This machine has opened up the world of miniature-making for me.
Here are some of the “wins” that I credit to Cricut Maker:
- Cutting the slots of the miniature cube bookcase dividers at the right width and at even spacing.
- Making this dollhouse rocking chair and mini MCM chair in wood. The curves are especially difficult to cut consistently with manual cutting.
- Cutting circles! With the help of a ruler, cutting straight lines are pretty easy to do manually. But as far as I know, there are no “circle rulers”. These gold-frame mirrors and this round jute rug require many circular cuts that are very challenging to cut neatly with a knife, especially with so many repeats.
Cricut Accessories
Of course, if you have the machine, you need the accessories to be able to use it. Here are my most-frequently-used Cricut accesories:
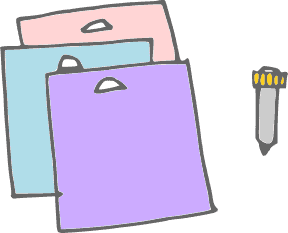
- Purple StrongGrip mat. Because I use mainly basswood, this mat an absolute necessity. I currently have 3 purple mats in my rotation, and use the newest/stickiest for basswood and matboard. The older ones are less sticky and I use them for paper or cardstock. I also have the Green StandardGrip and Blue LightGrip that came in a variety pack, as well as the Pink FabricGrip, but haven’t used any of them.
- Knife blade is another must for basswood and matboard cutting. I use this blade more often than the Fine-Point blade that comes with the machine.
I keep masking tape near my Cricut because I always use it for holding down material onto the mat, so it doesn’t shift during cutting.
This is a bit odd, but… lint remover. Hear me out. I still have one from my pet-owning days (RIP, MooMoo 💔), and it’s actually great for removing most of the debris from the sticky mats! Just roll it or dab it on, and when it’s covered with junk, rip out the layer to reveal a fresh, clean, sticky roll.
SMALLER TOOLS

Tweezers are especially invaluable for placing tiny pieces in place, such as the hardware of this campaign dresser, or the wood slats of this ceiling light and MCM slat bench.
Grid ruler is my go-to ruler. This plastic one is a 1/8″ thick, and has 1/8″ grid lines as well as 1/16″ markers on the edges.
Metal ruler is my backup ruler, especially if I need the cork backing’s non-slip function. One thing I don’t like about it is that the cork backing prevents it from laying flush to the surface.
ADHESIVES

Gorilla wood glue is is my current favorite glue for miniature making. In the beginning, I would use Aleene’s for everything, but it turns out that wood glue has a better bond on wood (duh!). To use, I normally squirt some onto some scrap paper, and use a toothpick to apply it to the pieces. Don’t be tempted to squirt directly onto your pieces, as you’ll end up with a gooey mess!
Aleene’s is a great all-purpose glue to have around.
Elmer’s Craft Bond glue stick is great for paper or when covering a large, flat surface quickly.
Fabric tape works better for me than fabric glue for gluing down fabric. The tape sticks immediately, so the fabric doesn’t come undone as the glue is drying. Although, you will also need Goo-Gone or other adhesive remover to clean out your scissors after cutting the fabric tape.
Glue Dots are my favorite removable adhesive for hanging wall decor or even putting up wallpaper. It’s stickier than Simply Tacky.
Grandmother Stover’s stikflat glue is what I would recommend for putting up wallpaper permanently. It doesn’t buckle the paper at all! I used it for this Brio renovation with awesome results. Just paste it on the wallpaper and use a credit card to smooth it out.
MATERIALS
It’s true that little things like dishes and foods and cups are what make a scene more lively, but I simply have no patience for making them. So I focus on bigger pieces like furniture and wall decor… things that you’ve seen on my blog.
Here is a list of materials that I stock up to make dollhouse furniture:
Basswood sheets in 1/16″ (try to get 8″ wide sheets if possible, or at least 6″) and 1/32″ (at 4″ wide) thickness. I recommend Midwest Products brand, which you can find on eBay, Hobby Lobby, or your local hobby shops. I will do a separate post about working with basswood.
4-ply matboard (the thick board that is used for framing) is also 1/16″ thick and can stand as an alternative to 1/16″ basswood. I use it when building a prototype or for pieces that aren’t visible.
An intricate design doesn’t always work with basswood, so I reach for 100lb card/cover stock and stack a few layers to get the effect. It works well with these mirrors! I also have a thinner cardstock that can go through my printer without jamming.
Velvet printable paper is great for rugs. I reviewed some options on the printable paper that I used on this printable rug post.
Foam core (or foam board) is great as an upholstery filler. I used it to make the cushions for the MCM wood-case sofa and chair.
Batting is also a good upholstery filler, especially if you prefer the cushy look. I’ve used them as a cushion insert of the rocking chair and as mattresses.
Lightweight cotton fabric is what I would recommend to use for upholstery. Thinner fabrics are simply easier to fold and less bulky, which make for a neater result. Just use the standard quilting-weight fabrics with solid colors and/or small patterns.
FINISHING SUPPLIES
Sometimes I get lazy, but going over the cut basswood with sandpaper really improves the result. I keep 150 and 220 grit sheets in my drawer.
Nowadays I much prefer spray painting, because it usually primer-and-paint in one. I like DesignMaster gold metallic spray paint and Rust-o-leum 2X Ultra Cover in basic colors.
I also have a small collection of acrylic paint by FolkArt and Decoart Americana. Whenever possible, I choose the multi-surface satin
For stains, I use Americana Gel Stains in Oak, Maple, and Walnut.
My children and I share this pack of paint brushes from Michaels. They’re inexpensive enough that I don’t feel so bad when they get destroyed.
Now, this list of tools and materials are by no means complete. If you notice anything missing, do let me know!
How about you? What is your go-to tool or equipment? Any specific material that you love working with? Anything you absolutely despise? Let me know in the comments below!

im so excited to get started! i looked and looked for your guidance online…THANK YOU FOR SHARING. me being a beginner at cricut maker (ive done cricut projects and succeeded) would foam be the best for myself to start with first? any recommendations are appreciated.
Hi Joi, thank you for your kind words! I personally use foam boards for making the base of cushions. For the miniature pieces, I prefer to use 1/16″ basswood and have the Cricut Maker cut it 🙂 You can start out with 1.5mm chipboard or matboard. My files will work with these two materials, as they’re very close to 1/16″ thick.
I use my husband’s framing ruler and cutter for cutting my foam core sheets. It is quick and if I do it right very neat. I use foam core at the moment for my buildings as it is what I have in my photo studio and I aim to use what I have first.
Yes, I like foam core too for making buildings and roomboxes (which I haven’t done a lot of)… no power tools required!
That’s a helpful list. I’m late to the party with cutting machines, so the items I’d add might not be so essential. I’d add a mechanical pencil, a mini carpenter square, a tiny hand drill and a gluing jig.
Great additions, Sherrill! A carpenter square is good to have. My minis are probably all wonky because I never use one… hahaha